How do you prepare your students for the fabulous collaboration that can occur when they work in groups? Stay tuned because I have a great team building activity for you!

Team Building in the STEM Lab
As many of you know I am a STEM Lab teacher and I will have to tell you that the number one thing I hear from other teachers is this: I could never get my kids to work in groups to design and build something! Never!
I will let you in on a little secret. We complete STEM events every single day. The teamwork and talk between students and how they help each other is just amazing. But, this didn’t happen accidentally! I set them up to be successful with team-building events at the beginning of the school year.
We spend the first class sessions with team challenges and this sets the tone for the rest of the year. I asked some students recently which team challenge was their favorite and the answer was, “The Winnie the Pooh one!”
So, that’s the one I am sharing with you today! It’s a great team challenge for August, but it is also one I will repeat in January when the students come back from Christmas break.
First, you will need a String Lifter for this team building event!
What is a String Lifter?
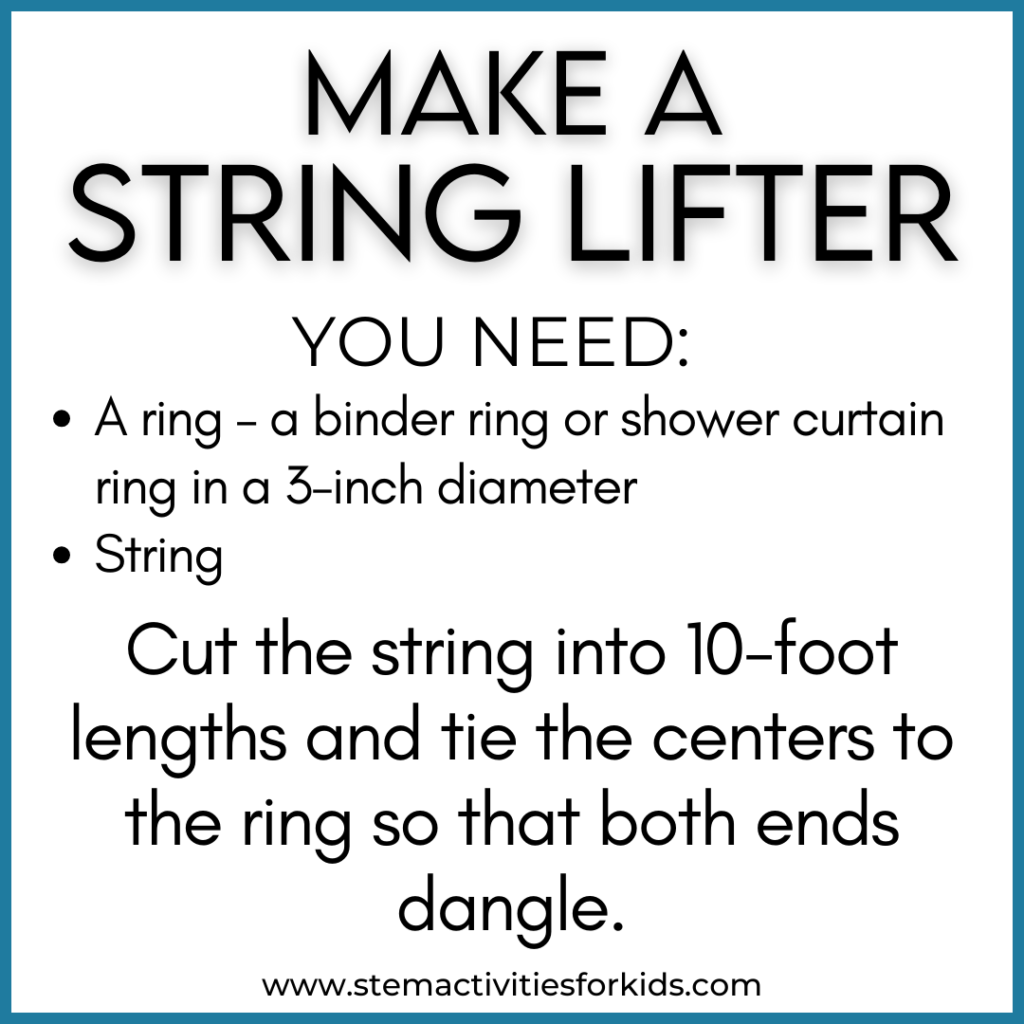
It’s a binder ring with about 18 strings attached. Each length of the string is doubled and tied to the middle ring so it makes 36 strings dangling. (The directions to make one are included at the end of this post!))
Next, you have students form a circle around the strings that are laying on the floor. Each student picks up one or two of the strings and holds them without lifting. (Some students will hold two strings and some might only hold one. Just be sure all of the strings are being held!) Place an object on the ring and the students must keep the object in place! In the photos, it’s a tennis ball! This is what I usually begin with.
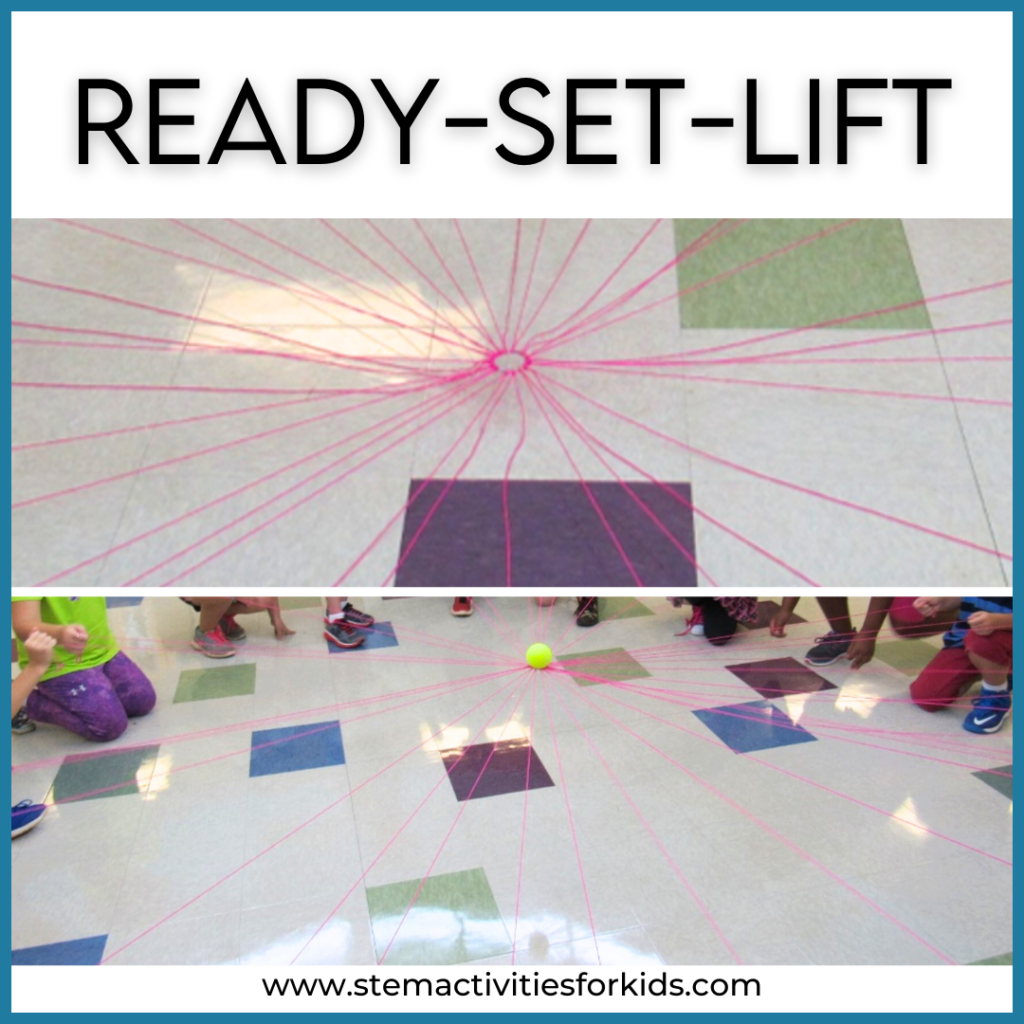
On your signal, the entire group begins to lift the strings so that the center ring remains stable. They will slowly rise from the floor trying to get in a standing position and then slowly lower back down to lay the strings gently back on the floor.
Well, honestly, the tennis ball (in the photo) is pretty easy! It sits on the center ring and rarely falls off.
So, of course, I make the task harder after the students can lift the tennis ball and set it back down.
I add something that is a little more precarious.
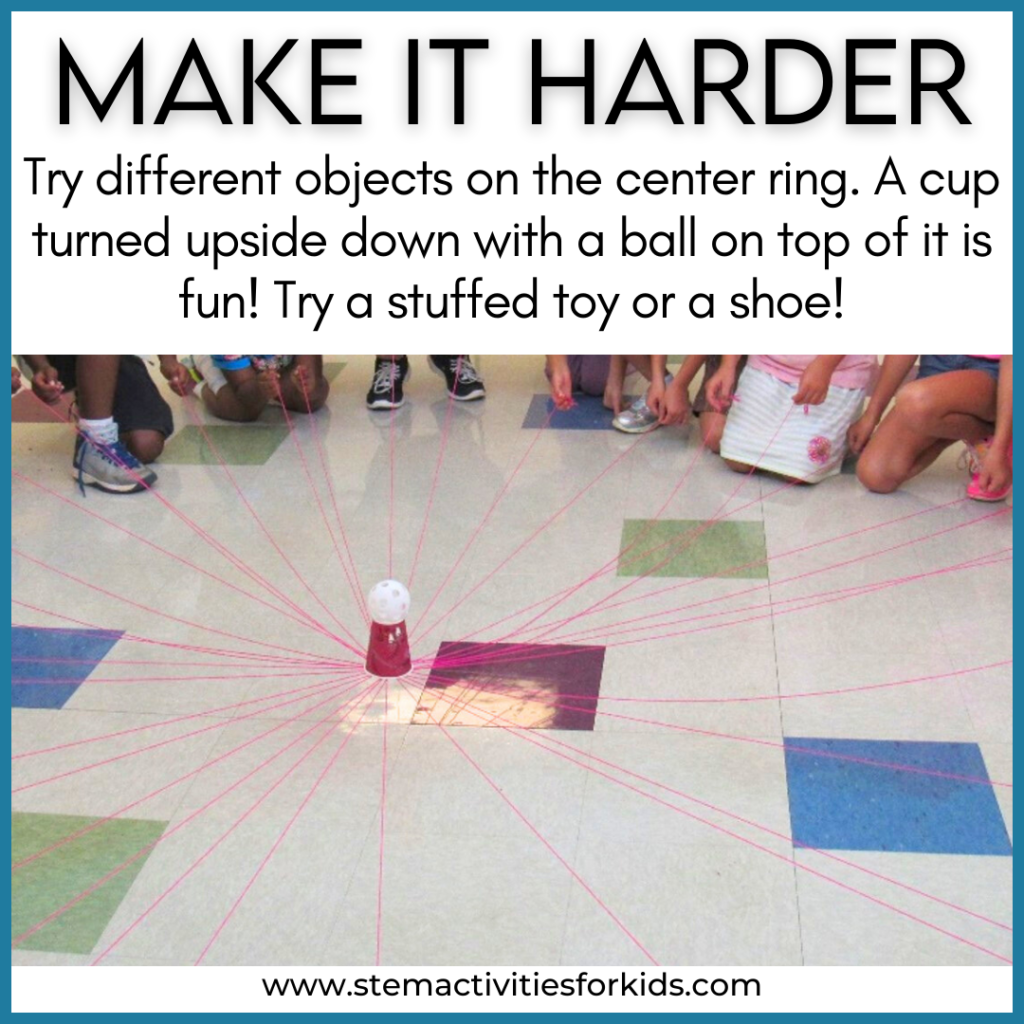
Can you see what is sitting on the ring in the picture above? It’s a cup turned upside down with a plastic ball sitting on top of it! Believe it or not, groups will work together to get this up and back down.
Here’s the part I cannot show you in the photos. The intense concentration and expressions on their faces is priceless. My favorite part, however, is the talk. The students encourage one another so much. There is a constant stream of voices telling teammates to lift or stay steady or increase the tension. They will cheer when they finally set that object back on the floor!
And, of course, you know what happens next….
I add something wonky to the center and make it even harder. And that is where the team challenge got the nickname of Winnie the Pooh! The last object placed in the center is a Winnie the Pooh stuffed toy. He wobbles more than all the other items because his little bottom is round and soft.
Guess what? The students still get him lifted off the ground. The cheers when Pooh is finally set gently down on the floor are the loudest of all!
Teamwork at its finest!
This is just one of the team challenges we complete every year (and in January). Try this one! I promise you will love it. After your students do it, try it with your faculty!
If you are looking for more about team building try these:
Making Your String Lifter
And, because I get so many questions about exactly how to make the string device here are some close-ups for you and more details. The string is a nylon string purchased at Home Depot. After looping these on the center ring, I also tie a double knot at the end of each string. This helps with the string unraveling and provides something the students can hold onto as they complete the task.
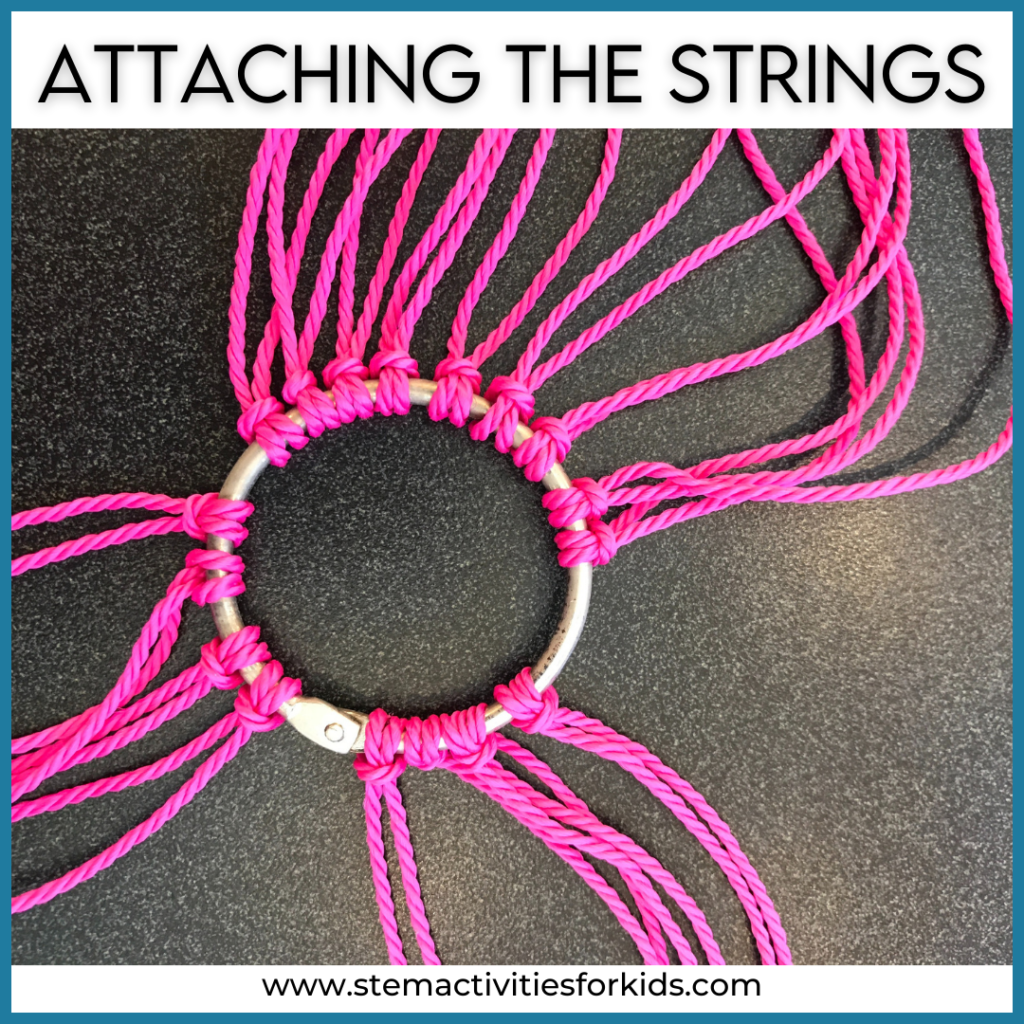
The binder ring has a diameter of 1.75 inches. The strings are nine feet long, but that length is doubled.
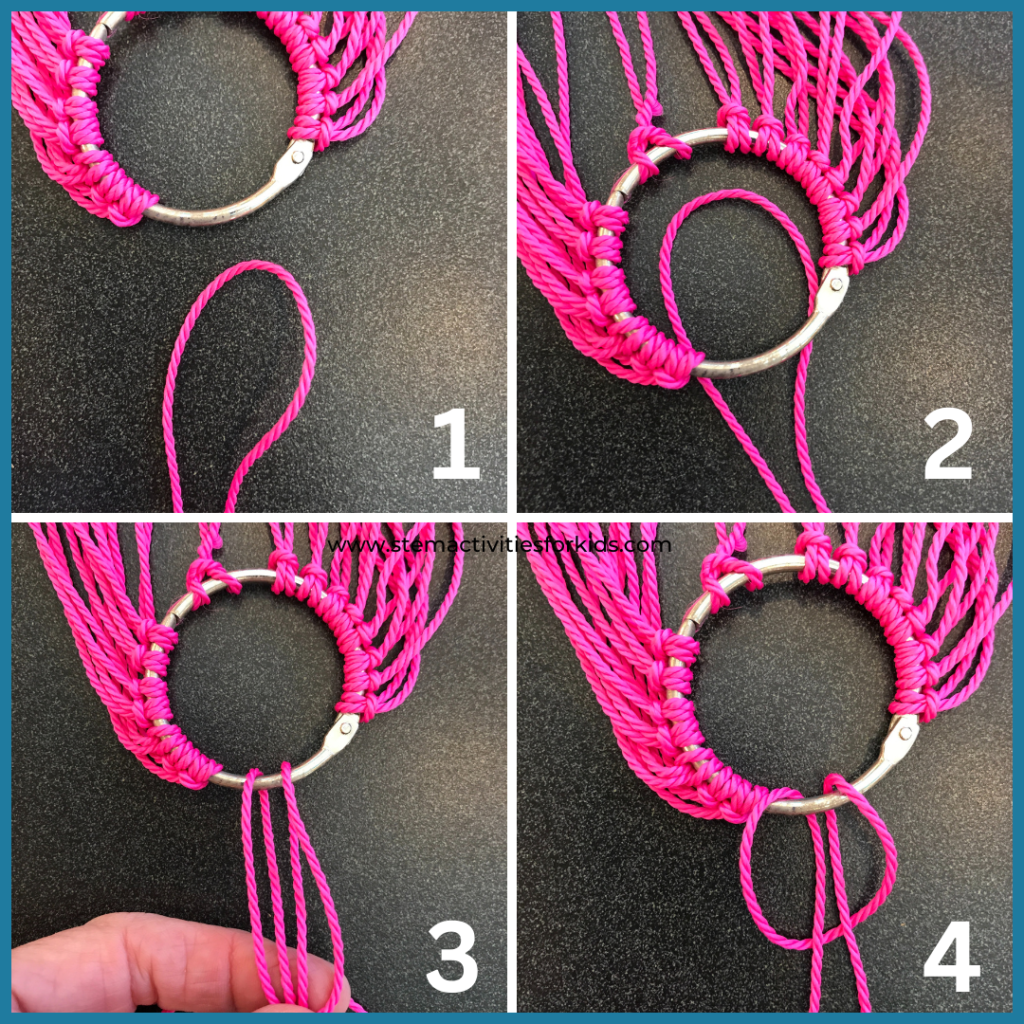
- Fold the length of the string in half so the end is looped.
- Place the loop under the binder ring.
- Fold the loop over the binder ring and then pull the dangling strings through the loop.
- Pull the string tightly and continue to do this until the ring is covered all the way around.
That’s your string device!
The String Lifter is a winner for team building in my STEM lab! Students love it and beg to repeat it when we have a minute. I store my string lifter by wrapping it around a cardboard tube and reuse it every year!


46 Comments
Leave your reply.