This guest post was written by Brian at Telescope Guide. Be sure to visit the site for all things astronomy related.
Learning about astronomy, space, and our solar system can be super fun for kids with hands-on activities. It’s never too early to start introducing them to basic concepts. You can learn about the earth, sun, moon, planets, stars, and galaxies beyond.
Here are 5 ideas for space activities you can easily use at home. Hopefully some of these will help spark in your kids an interest in the wonders of our universe!
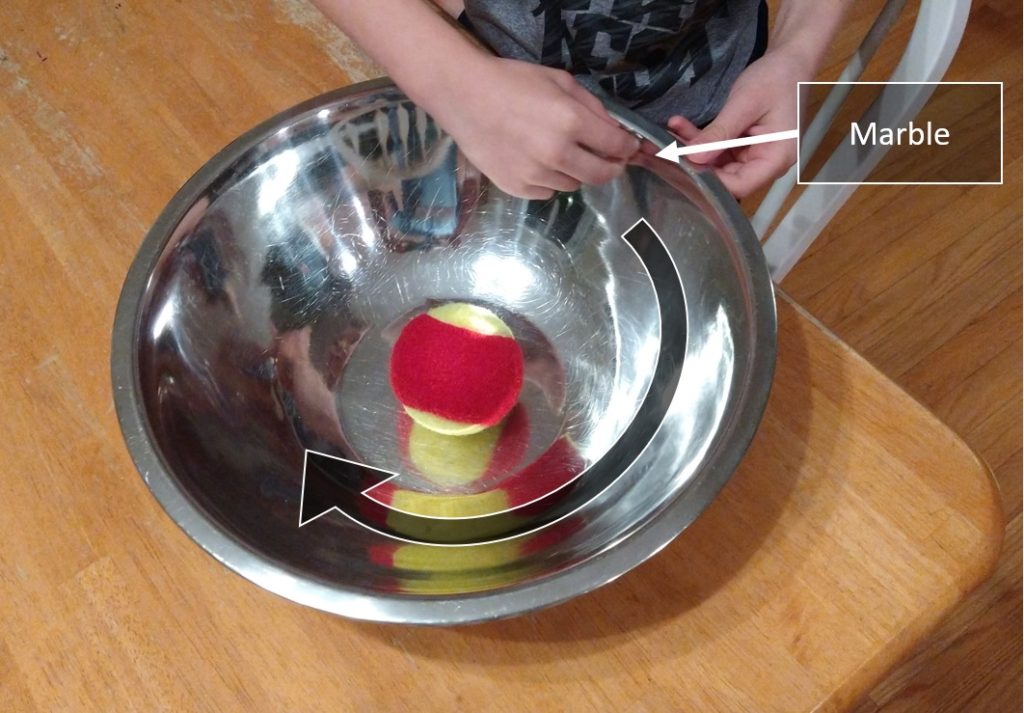
1. Learn how gravity and speed keep things in orbit, with a kitchen bowl and a marble
Why do objects go around and around other objects in space, seemingly forever?
This is a great activity to help kids visualize how gravity affects the trajectory of an object as it flies through space. It helps explain the delicate “tug of war” between the velocity (speed) of an object vs. the gravitational pull of the larger object that it’s orbiting.

What you need:
- A marble (which represents a planet orbiting the sun)
- A tennis ball (which represents the sun)
- A large kitchen bowl
Try to throw the marble so that it “orbits” the tennis ball for as long as possible. (To make this even more fun, have a little competition and see who can get the marble to stay in orbit the longest.)
This is such a simple experiment, but you can explain some basic concepts about how gravity and velocity combine to keep objects in orbit:
- If the marble goes too slow, it falls towards the center. If it goes too fast, it flies out of the bowl. The speed has to be “just right” to keep it in orbit.
- Why doesn’t the marble keep going around forever? (Answer: Friction! There is no friction in space.)
- Try making the orbit elliptical (oval-shaped)
You would probably think only the younger kids would enjoy this, but you might be surprised to see teenagers getting interested as well. It’s a fun way to experiment with different variables and get a deeper understanding of some key concepts in physics.
For older kids, you can take this as far as you want. You can talk about how mass (the star) causes the curvature of space (the bowl). Talk about the physics of gravitation and escape velocity. (You can even work out some of Newton’s equations. If the kids are old enough to get into the mathematics of gravitation, here’s an interesting resource at khan academy.)
2. Learn about the phases of the moon, with a flashlight and a golf ball
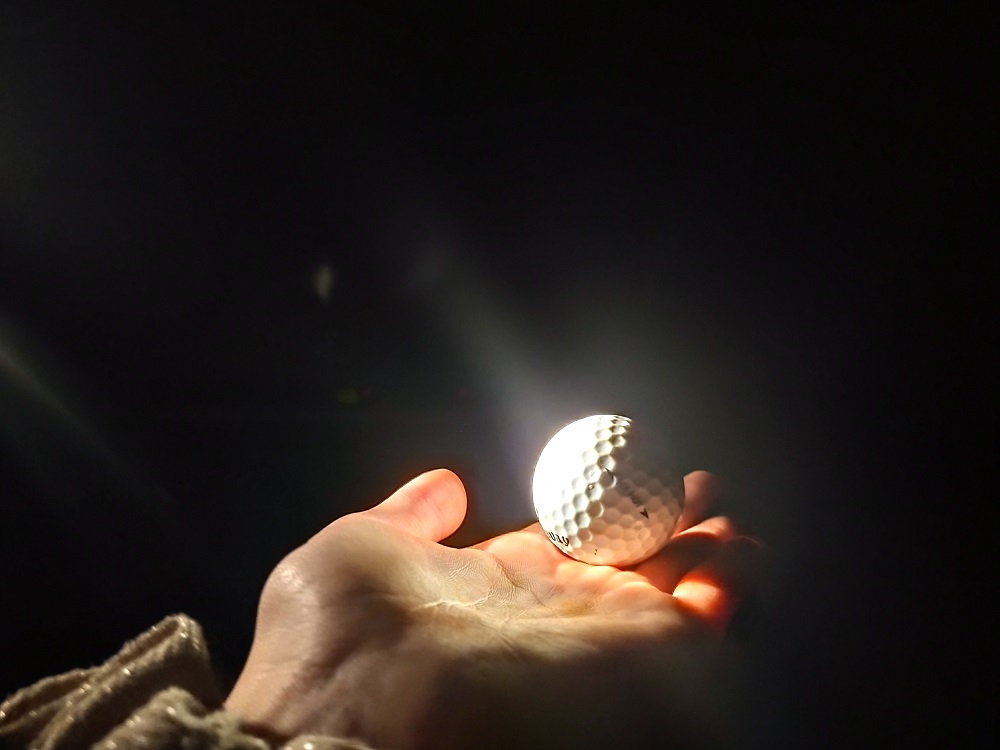
All you need for this activity are a flashlight and a golf ball (it sort of resembles the moon with its craters.)
It takes the moon about a month (a “moonth”) to make one revolution around the earth. During that time, it goes through the following phases: New Moon, Waxing Crescent, First Quarter, Waxing Gibbous, Full Moon, Waning Gibbous, Third Quarter, Waning Crescent.

Before you do the activity, start out by watching this YouTube video explaining how the moon and the earth move together.
Then, go into a dark room. The parent will need to stand on a chair (this is important), and hold the flashlight making sure it’s always pointing directly at the moon (this is also important). Meanwhile the kids will take turns holding the golf ball in the palm of their hand as shown in the image above.
As they rotate in a 360-degree circle, the person holding the golf ball will be able to clearly see all the phases of the moon on the golf ball. This is a great way to help kids visualize the way the light from the sun bounces off the moon at different angles throughout each month.
(Note: If you don’t stand on a chair, then the person holding the ball will block the light during the full moon phase. For the same reason, make sure the golf ball isn’t held too low.)
Bonus exercise: See if you can re-create a solar eclipse (but be careful not to stare directly into the flashlight for very long!). In a solar eclipse, the sunlight is completely blocked out by the moon. Also try to re-create a lunar eclipse, where the earth (the person holding the ball) casts its shadow over the moon during the full moon phase.
3. Make a model of the solar system
Now that you understand how gravity causes objects to revolve around one another in space, and you’ve learned a little bit about the earth and the moon – it’s time to move on to the broader solar system.
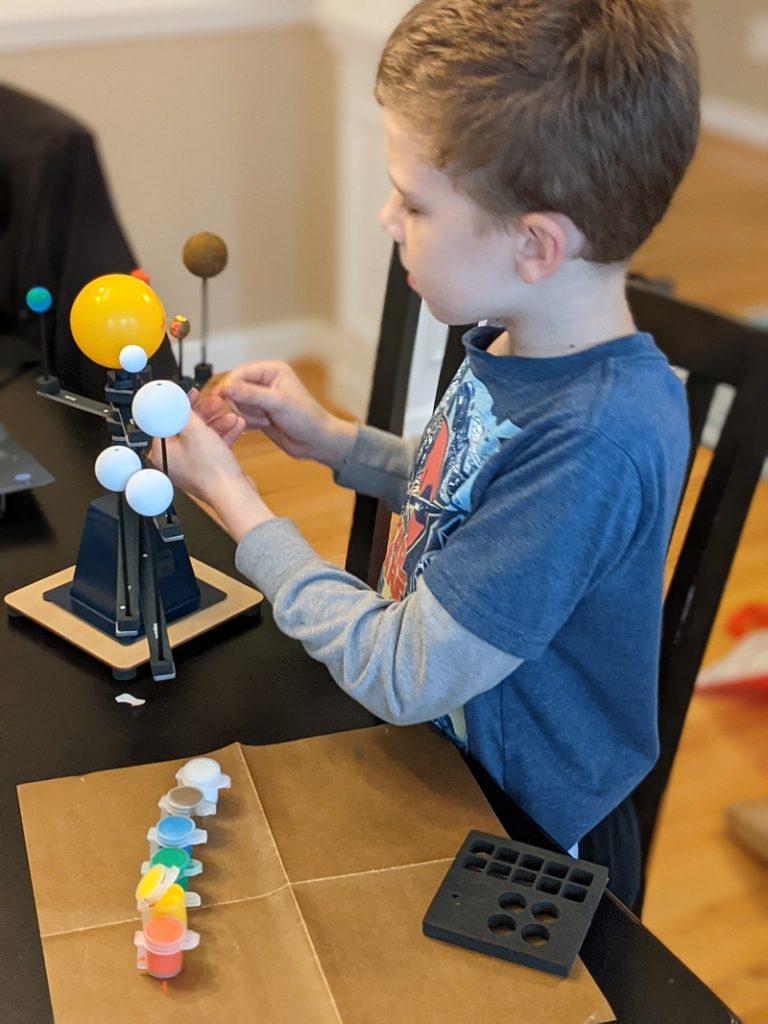
For this project, you can buy the supplies yourself at any local craft store. Or, you can save a little bit of time and buy a kit with everything you need. For example, shown below is a good kit option reviewed by TelescopeGuide.org (see the full article here).

Key concepts to teach:
- Learn to name the planets, in order according to their distance from the sun
- Which planets are the smallest, and which ones are the largest?
- As you paint each planet, do a little bit of reading online to learn some of the key characteristics of each planet.
If you’re buying the supplies yourself, here’s what you’ll need (all available from your local craft store):
- 8 small foam balls that you can buy at any craft store. (And get a variety of sizes.)
- Get an extra-large foam ball to be your “sun.”
- Bamboo skewers or dowel rods. (Cut them to a variety of lengths to simulate different distances from the sun.)
- To make the solar system, you simply use the skewers or dowel rods to attach the planets to the sun. You can optionally paint them using acrylic paints.
4. Learn to find the brightest stars and planets in the sky
This one doesn’t require any special equipment other than a smart phone and a cloudless view of the sky.
For this exercise, you don’t even need to find a “dark sky” site – most suburban neighborhoods will be fine. (Light pollution will keep you from seeing the full beauty of the sky. However, you should still be able to find the brightest planets and stars.)
Step 1- Download a star map app (there are plenty of good ones: SkySafari, Star Walk, SkyView, and more). These apps use the camera and your phone’s sensors, enabling you to point your phone at the sky and find things.
Step 2- Find the following targets:
Depending on your location and the season of the year, you should be able to find some of the following planets and stars. (But keep in mind they will never all be visible at the same time.)
- Jupiter – this is one of the brightest objects in the sky, and the easiest to find (without a star map)
- Mars – it has a distinct red/orange color, even with the naked eye!
- Saturn – while Saturn is not quite as bright as Jupiter and Mars, you can easily learn to locate it
- Try finding Venus and Mercury as well
- You can also try to find some of the brightest stars in the sky: Sirius, Canopus, Alpha Centauri, Arcturus, and Vega. Learn to recognize them based on the constellations where they are found.
(Note if you’re reading this in January 2021 – it’s a spectacular time of year to see Mercury, Jupiter, and Saturn together in a rare conjunction involving all 3 planets.)
Step 3- Repeat this exercise regularly. (Try going outside once a week or so.) With time, you will start to gain familiarity with how the stars and planets move and change with the seasons.
5.Go camping at a dark sky location near your house
If you really want to super-charge your kid’s interest in astronomy, there is no substitute for going to an international designated dark sky location. (Find one here.) Many of these offer camping options, so you can make an adventure out of it!
The beauty of the milky way can be seen in all its splendor from one of these locations. And trust me, it will be far different from anything you’ve ever seen from your own neighborhood or backyard (unless you live in a rural location).
If you want to see even more, you can incorporate binoculars into your viewing sessions, or even a small telescope (some telescope ideas here). Binoculars or a telescope will allow you to see more stars and more detail than you can see with your naked eye
For more ideas, here’s a great article on the top things to see in the sky – bring your smart phone to help you find things, and soak in the beauty of our galaxy (and beyond)!


Leave a Reply
Your email is safe with us.