Dreaming about cooler weather? Beat the heat with one of my kids’ favorite engineering design challenges: the (Antarctica) Ice Shelter STEM Challenge! This activity easily incorporates a wide range of STEM and other disciplines and is a great way to introduce the engineering design process or fine-tune those critical thinking skills. To get started, first engage your students in a story…
You are on a journey through Antarctica! The extreme cold reaches as low as -136°F (-95°C) which makes it difficult for scientists and researchers to stay and work here. How do they do it? You will soon find out!

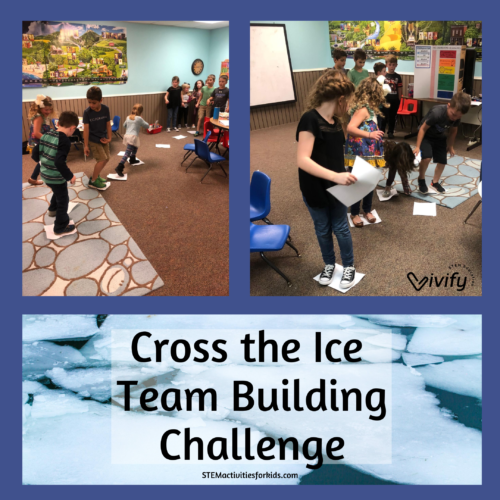
Cross the Ice Team Building Challenge
Before you dive into the engineering design challenge, your class needs to learn how to work as a team! Icebreaker activities are a great way to practice teamwork, communication, and other 21st century skills. You can find more easy icebreaker activities in our post on tower challenges here.
This is also a great time to discuss the geography of Antarctica and incorporate the history of the continent. Tell your kids that this journey through Antarctica takes them to a path crossed by freezing cold water where they must use thin sheets of ice to get to the other side. Split the class into 2-3 teams with at least 4 kids on each team. The goal is for each team to begin at one side of the room and cross to the other side of the room while only touching sheets of paper.
- Students are given one more sheet of paper than people in their team. (For example, if it is a team of 5 students, they will need 6 sheets of paper).
- Students must work together to cross the room.
- Cannot touch the floor
- Cannot scoot the paper on the floor
- The entire team must reach the other side of the room.
Students must communicate and work together effectively to succeed in this challenge. They will eventually figure out that the teams must form a line and use the sheets of paper as stepping stones. The last person in their line will pick up the paper they previously stepped on and pass it to the person in the front of the line to continue to move forward.

Phew! You have made it across the icy sea, but now it is getting late and you must seek shelter for the night to protect your team. Build an insulated shelter prototype that maintains a safe temperature inside and has a working door.
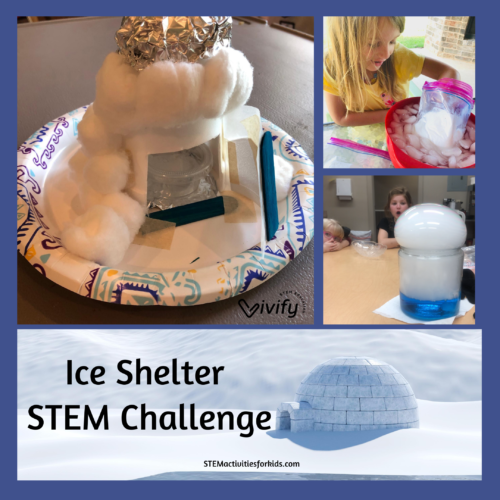
Ice Shelter STEM Challenge
Your students are now primed for the main challenge. Providing supplies like paper plates, cups, cottonballs, foil, craft sticks, paper, tape, and scissors, task them with building insulating shelters in teams of 2-3 students. Make sure you don’t say “igloo” or you will see very similar designs and stifled creativity. Discuss what “insulating” means and offer examples like coffee mugs or insulating lunch boxes that the kids can relate to.
Guide students through the engineering design process where they identify the problem needing to be solved, then brainstorm ideas, draw up a design, build their shelter, and test it!
How will you know the designs are successful? They need to maintain temperature, that is what an insulator does after all, so add some ice! Use small condiment containers and place an ice cube inside. Each team must place an ice cube container inside their shelters and close the door. Set an ice cube container by itself within the classroom as a control. Let the ice sit for at least 15 minutes before checking it.
Carefully remove the ice and measure how much water is in the students’ cups as compared to the ice left outside in the classroom. Use medicine cups to accurately measure the melted ice water and write down results on the whiteboard to compare between teams. Are there some shelter designs or materials that seem to be more effective than others? If possible, allow time for students to improve their designs and test again with new ice. Then have students present their results to the class!
Extension Activities
If able, consider conducting some extension activities while you wait during the testing phase. In my classes, we have at least two rounds of testing which gives us two 15-minute blocks of time to dive deeper into the topics of insulation and states of matter. Here are the activities I recommend:
- Blubber experiment- Fill a bowl full of ice and water. Have students take turns sticking their hand in the ice water. Brrrr! Then fill an inside-out ziploc bag full of shortening and place another ziploc bag into it to create an insulated glove. Now have students use this glove to dip their hands in the ice water. Much better? Talk about how the animals who live in the Arctic waters stay warm because of the thick layer of fat under their skin called blubber.
- Dry Ice States of Matter – Demonstrate sublimation point, properties of matter, and states of matter with dry ice experiments. This free guide by Steve Spangler is a great start.
Are you ready for your journey to Antarctica? You can get the complete instructions, teacher guide, and student handouts for this lesson here that fits within our STEM Explorers curriculum or works as a stand-alone activity.
Wish to use this for distance learning? Use this version that includes digital student STEM journals for Google Slides, Seesaw, and Flipgrid as well as an editable note to send to families.


Leave a Reply
Your email is safe with us.